Every once in a while you need some good, comfort food that really sticks to your ribs. I feel like I've been drawn to it more and more, but I've been putting up a good fight. However, here are a few instances where I lost the battle and just had to make them! They were very good and I did at least serve them with a good helping of veggies on the side.
First, I made Spaghetti Carbonara, but I substituted Penne pasta for Spaghetti. It was delicious! I used a different recipe than the one of Emeril's here: Spaghetti Carbonara but the link to my recipe disappeared the other day. I also used proscuitto instead of actual bacon. YUM!!!
Needless to say, it hit the spot!
Several days later I made Chicken and Cheese Enchilladas. This recipe from Campbell's works really well for me and my family because we're really wimpy and can't handle spicy foods too well (except my husband). Campbells Chicken & Cheese Enchillada Recipe
This is a hit every time. Even my 4 yr. olds love it!
Wednesday, November 3, 2010
Tuesday, September 21, 2010
A Late Dinner
Sunday night turned out to be a late night for eating dinner. As it was already 8pm, I made the girls a quick PB&J with fruit leather and a cheese stick and sent them to bed. Then I made these for Jeremy & I. Let me just tell you - they are amazing!!!!! We were so hungry and these were so good that we ate half of them all on our own! If you like the Chili's Southwestern Egg Rolls, then you'll love these and you can have them anytime you want. I also found Spicy Ranch Dressing by Hidden Valley to dip them in. Every bite was perfect!!
Note: You find Egg Roll Wrappers in the refrigerated case in the produce section of your grocery store.
First, here is the recipe that I followed: You're Gonna Bake It After All's Baked Southwestern Egg Rolls
(Disclaimer: I have a good camera, but the lighting in my kitchen is currently terrible at night, so you'll have to excuse these not-so-great shots.)
The filling - it looks like a ton, but you use it all up believe it or not! I was almost done filling them when I remembered to even take this picture. And - I might add - that is fresh corn from our garden!
Place a good amount of filling on the egg roll wrapper:
How to fold your egg rolls:
Step 1: Fold bottom point up.
Step 2 & 3: Fold sides in and mess with them a little to get the corners tucked in.
Step 4: Roll it up.
Step 5: Wet the last corner and stick it to itself.
Step 6: Place on a greased cookie sheet, brush (or spray) with oil and pop it in the oven for 7 min. Turn them over and bake another 8 min.
Step 7: Put as many as you want on your plate with the dressing and eat until your heart's content! Be careful though - they are pretty hot.
Note: You find Egg Roll Wrappers in the refrigerated case in the produce section of your grocery store.
First, here is the recipe that I followed: You're Gonna Bake It After All's Baked Southwestern Egg Rolls
(Disclaimer: I have a good camera, but the lighting in my kitchen is currently terrible at night, so you'll have to excuse these not-so-great shots.)
The filling - it looks like a ton, but you use it all up believe it or not! I was almost done filling them when I remembered to even take this picture. And - I might add - that is fresh corn from our garden!
Place a good amount of filling on the egg roll wrapper:
How to fold your egg rolls:
Step 1: Fold bottom point up.
Step 2 & 3: Fold sides in and mess with them a little to get the corners tucked in.
Step 4: Roll it up.
Step 5: Wet the last corner and stick it to itself.
Step 6: Place on a greased cookie sheet, brush (or spray) with oil and pop it in the oven for 7 min. Turn them over and bake another 8 min.
Step 7: Put as many as you want on your plate with the dressing and eat until your heart's content! Be careful though - they are pretty hot.
Thursday, September 16, 2010
I LOVE Basil
It's not often that you get to have the freshest ingredients at your fingertips, but in this case, I have tomatoes galore and quite a harvest of basil this year. It's also not very often that I get to have really great lunches, but thanks to my basil and tomato crop I got several lunches and dinners that just about sent me through the roof they were so good!
The first is one of my favorites - Bruschetta. I posted this quite some time ago, so here's the old blog: Julia Child's Bruschetta Process . This time I did use Basil and as always hit just the right spot.
My friend, Mandy, made the best tomato-basil tart for Easter and so I got her recipe and made this too. However, I had pastry sheets left over instead of pie crust. It was divine! Sorry I didn't get any pictures. We scarfed it down to quickly! Here's the recipe link and you can make your own: Giada De Laurentiis Heirloom Tomato and Basil Tart Recipe.
I've been making pesto sauce from that recipe and here was the other lunch I managed to get pictures of before devouring it!
Making the pesto. Isn't it gorgeous?
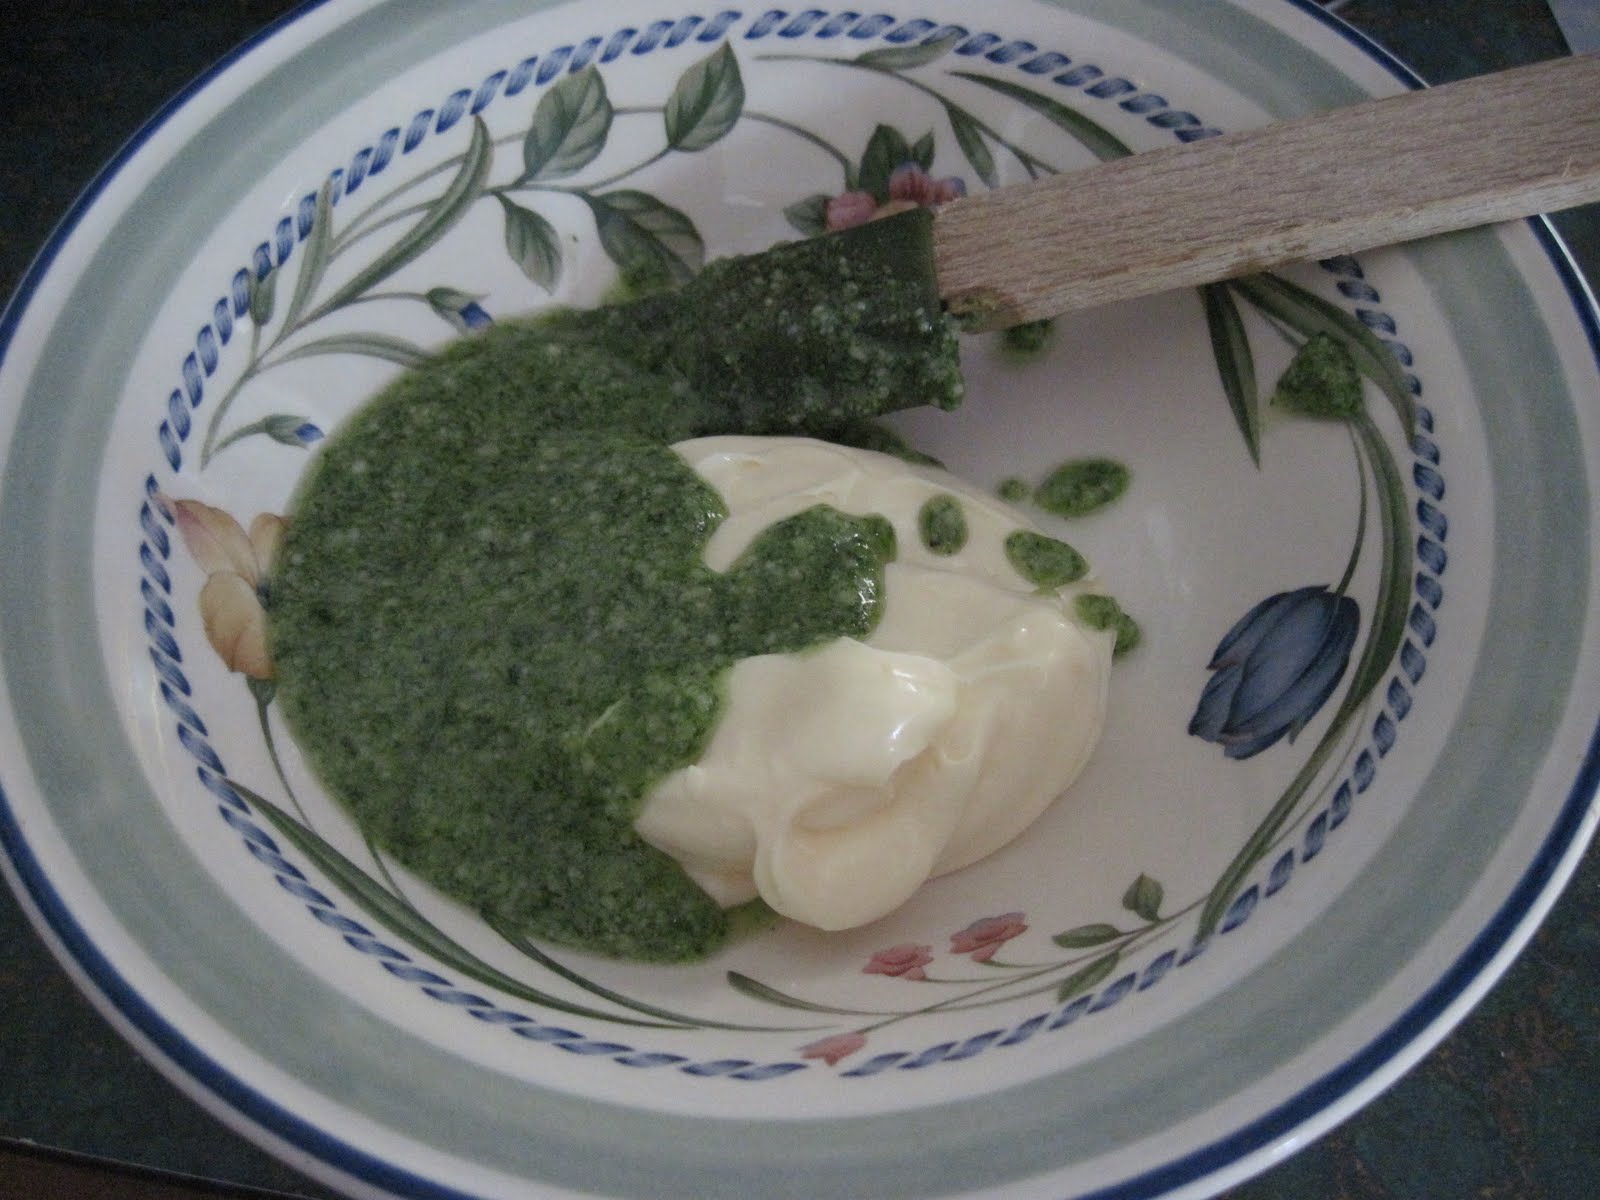
I wanted a good sandwich and I really enjoy paninis. I took 2 slices of Italian bread and brushed them with Olive Oil. Then I made pesto mayonnaise. I didn't measure anything, but it turned out to be about 1/2 mayo with 1/2 pesto.
Coat both slices of bread on the inside (not the side with the olive oil - that will be directly on the pan).
Then add your beautiful, tasty tomatoes!
We had left over grilled chicken, so I sliced that up and gave it a slather of my pesto mayo:
Topped that with proscuitto (imported is the best):
Then topped it with my other slice of bread (pesto-mayo side in). See my olive oil brush?
Then cook over fairly high heat and press on the sandwich to get that panini "squished" look. Flip over and cook the other side too until just heated through and toasted well on each side.
Sit down and get ready to thoroughly enjoy every last bite!!!
Remember, I still had a bunch of pesto left? I made some penne pasta, diced up a tomato and added my pesto to it all. Gave it a good stir and we had a tasty dinner the other night. It was enjoyed by all!
The first is one of my favorites - Bruschetta. I posted this quite some time ago, so here's the old blog: Julia Child's Bruschetta Process . This time I did use Basil and as always hit just the right spot.
My friend, Mandy, made the best tomato-basil tart for Easter and so I got her recipe and made this too. However, I had pastry sheets left over instead of pie crust. It was divine! Sorry I didn't get any pictures. We scarfed it down to quickly! Here's the recipe link and you can make your own: Giada De Laurentiis Heirloom Tomato and Basil Tart Recipe.
I've been making pesto sauce from that recipe and here was the other lunch I managed to get pictures of before devouring it!
Making the pesto. Isn't it gorgeous?
I wanted a good sandwich and I really enjoy paninis. I took 2 slices of Italian bread and brushed them with Olive Oil. Then I made pesto mayonnaise. I didn't measure anything, but it turned out to be about 1/2 mayo with 1/2 pesto.
Coat both slices of bread on the inside (not the side with the olive oil - that will be directly on the pan).
Then add your beautiful, tasty tomatoes!
We had left over grilled chicken, so I sliced that up and gave it a slather of my pesto mayo:
Topped that with proscuitto (imported is the best):
Then topped it with my other slice of bread (pesto-mayo side in). See my olive oil brush?
Then cook over fairly high heat and press on the sandwich to get that panini "squished" look. Flip over and cook the other side too until just heated through and toasted well on each side.
Sit down and get ready to thoroughly enjoy every last bite!!!
Remember, I still had a bunch of pesto left? I made some penne pasta, diced up a tomato and added my pesto to it all. Gave it a good stir and we had a tasty dinner the other night. It was enjoyed by all!
A good use for watermelon
I had bought a watermelon a while ago but then no one was in the mood for anymore eating of it. I found this idea in one of Martha Stewart's Living Magazines and thought I'd try it out. It turned out very good. It's best served with something light to eat. I made it and ended up using it to accompany a turkey dinner - not a good combo. Everyone liked it when they drank it before the meal. However, during and after the dinner it just didn't taste very good with the heartiness of the meal. As a disclaimer: It's not that I can't plan correctly, I just needed to get it used up.
So...Here's the recipe: Martha Stewart's Watermelon Punch & Bowl
I crushed up the watermelon:
Then I put it through my new jelly bag to strain out the juice:
The rind carved out and being chilled:
The end result!
Enjoy!!!
So...Here's the recipe: Martha Stewart's Watermelon Punch & Bowl
I crushed up the watermelon:
Then I put it through my new jelly bag to strain out the juice:
The rind carved out and being chilled:
The end result!
Enjoy!!!
Canning Jelly & Jam
We just found a huge tree of crab apples on some property owned by our friends. Jeremy thought it would be neat to see if we could make crab apple jelly, so we gave it a whirl. His Mom gave us some pointers: Buy and follow the directions from the Certo brand pectin and get a jelly bag. The pectin can be bought at your local supermarket. The jelly bag was a little more difficult to find, but we have a hardware store in town that sells just about everything you thought you'd never need but sometimes do. You can also find them online. We used this recipe: Apple Jelly Recipe and here was the process:
First we picked the crab apples. We felt like we didn't have many in this big tote/bin, but it turned out to be WAY more than we needed.
Aren't they cute little things?
Next, cut them up to make sure they don't have any worms, etc... Put them in a pot and just cover them with water to get them nice and soft.
They don't look beautiful at this point, but they're ready to be strained through the jelly bag to extract the juices.
Straining out the juice in my newly purchase jelly bag.
There was alot of pulp left over and I just hated to throw it away, so I decided to put this through my food mill and make apple sauce. Beware, crab apples are really sour and tart. The applesauce needed a lot of sugar and cinnamon to help it out. The girls did enjoy the finished product.
Now back to the jelly! Here is the juice we finally extracted. Isn't it the prettiest pink color? We had enough to make about 2 batches with a little left over which we froze. Not sure what we'll use if for. We'll see!
Sterilized all the jars and getting them ready to fill:
Boiling the juice, sugar and pectin. Watch it closely and constantly stir to avoid the sugar burning and a boil over!
All jarred and processed. Waiting for the tops to seal. I just love hearing all the pops!
Aren't these pretty? I'm hoping to sell these at a craft show and give as Christmas gifts. However, we did keep a jar's worth for PB&Js and it's pretty good!!
I then went on to make 2 batches of Blackberry & Elderberry Jam. My Aunt had given me a big pan of blackberries from her yard and we had a crop of elderberries that we had frozen from last year from my parent's yard. I used Certo's recipe again. Here it is: Certo's Blackberry Jam Recipe I just added the elderberries to the mix and counted it all for the volume of fruit.
Here it is getting cooked down.
It was basically the same process as the apple jelly. However, with the jam, I kept most of the seeds in it. This too turned out very pretty and I've heard it was very good!
First we picked the crab apples. We felt like we didn't have many in this big tote/bin, but it turned out to be WAY more than we needed.
Aren't they cute little things?
Next, cut them up to make sure they don't have any worms, etc... Put them in a pot and just cover them with water to get them nice and soft.
They don't look beautiful at this point, but they're ready to be strained through the jelly bag to extract the juices.
Straining out the juice in my newly purchase jelly bag.
There was alot of pulp left over and I just hated to throw it away, so I decided to put this through my food mill and make apple sauce. Beware, crab apples are really sour and tart. The applesauce needed a lot of sugar and cinnamon to help it out. The girls did enjoy the finished product.
Now back to the jelly! Here is the juice we finally extracted. Isn't it the prettiest pink color? We had enough to make about 2 batches with a little left over which we froze. Not sure what we'll use if for. We'll see!
Sterilized all the jars and getting them ready to fill:
Boiling the juice, sugar and pectin. Watch it closely and constantly stir to avoid the sugar burning and a boil over!
All jarred and processed. Waiting for the tops to seal. I just love hearing all the pops!
Aren't these pretty? I'm hoping to sell these at a craft show and give as Christmas gifts. However, we did keep a jar's worth for PB&Js and it's pretty good!!
I then went on to make 2 batches of Blackberry & Elderberry Jam. My Aunt had given me a big pan of blackberries from her yard and we had a crop of elderberries that we had frozen from last year from my parent's yard. I used Certo's recipe again. Here it is: Certo's Blackberry Jam Recipe I just added the elderberries to the mix and counted it all for the volume of fruit.
Here it is getting cooked down.
It was basically the same process as the apple jelly. However, with the jam, I kept most of the seeds in it. This too turned out very pretty and I've heard it was very good!
Fruit Leather - A Production
This was my first attempt at making Fruit Leather. Although it makes me feel very good about the fact that it is homemade, I am going to have to say that by the time you run your oven for over 12 hrs. (if you're making more than one batch) you may be spending less money at the store getting the organic, no-preservative fruit leather than by making your own. That's my personal opinion. This also took several days because we didn't feel good about leaving our oven on at night - which is the only time in this household that you can get a straight 8-12 hrs. of uninterrupted time. We also learned that when keeping your gas oven at such a low temp. it is prone to going out. We had to air out our house a couple times during this process. So, you see, it's best to be awake and aware while doing this. Now that I've told you all of the downfalls, I will say, however, that everyone needs to try things once in their life and this is it! It did turn out quite good and the girls love it. I added nothing but a little squirt of Agave Nectar to each batch.
Apparently, back in the day, it was made by putting it out in the direct sun under tented cheese cloth. That's more of how I roll - not driving up my utility bill! Now that I know that I think I'll try to do this on a nice, hot, dry, summer's day - if we ever get one of those in this neck of the woods!
Here was the saga of my production. I referred to this lady's blog for my recipe: In the Little Red House - Fruit Leather Recipe
Here are my peaches being cooked down:
Concord Grapes - Love these things!
The peaches and the plums being processed. And, yes, I ended up with 2 food processors! How fun!
Pressing the seeds out of the grapes through a colander and keeping the juice and whatever pulp came through:
In the oven they all go at the lowest temp your oven can get for 8-12hrs! However, you have to allow for air flow, so you can really only do 2 at a time. I had to remove 2 of them part of the way through the process:
First batch done - the concord grape. Look at how easily it pulls off of the parchment!
Homemade grape fruit roll ups! They taste so good - just like fresh concord grapes!!! Actually, you may want to just cut these with kitchen shears instead of rolling. They're pretty tough, hence the name Fruit Leather!
The peach came next:
See how I cut these in little "fruit flats", as my girls call them? Much easier to cut and eat this way:
The plum - very good and quite pretty if I do say so myself!
All in all it was an interesting experiment and if I can do this without using the oven next year, it will be an awesome way to keep fruit and make wonderful snacks!!!
Apparently, back in the day, it was made by putting it out in the direct sun under tented cheese cloth. That's more of how I roll - not driving up my utility bill! Now that I know that I think I'll try to do this on a nice, hot, dry, summer's day - if we ever get one of those in this neck of the woods!
Here was the saga of my production. I referred to this lady's blog for my recipe: In the Little Red House - Fruit Leather Recipe
Here are my peaches being cooked down:
Concord Grapes - Love these things!
The peaches and the plums being processed. And, yes, I ended up with 2 food processors! How fun!
Pressing the seeds out of the grapes through a colander and keeping the juice and whatever pulp came through:
In the oven they all go at the lowest temp your oven can get for 8-12hrs! However, you have to allow for air flow, so you can really only do 2 at a time. I had to remove 2 of them part of the way through the process:
First batch done - the concord grape. Look at how easily it pulls off of the parchment!
Homemade grape fruit roll ups! They taste so good - just like fresh concord grapes!!! Actually, you may want to just cut these with kitchen shears instead of rolling. They're pretty tough, hence the name Fruit Leather!
The peach came next:
See how I cut these in little "fruit flats", as my girls call them? Much easier to cut and eat this way:
The plum - very good and quite pretty if I do say so myself!
All in all it was an interesting experiment and if I can do this without using the oven next year, it will be an awesome way to keep fruit and make wonderful snacks!!!
Subscribe to:
Posts (Atom)