Monday, November 14, 2011

Pumpkin Cake Balls


As I'm sure most of you have noticed, cake balls are very trendy.  With that said, I volunteered to make cake balls for a fund raising banquet that my amazing friend Mandy catered for an amazing ministry - Ithaca Pregancy Center.  Please check out their website here: Ithaca Pregnancy Center and see how they have intervened and helped the unborn babies' voices be heard.  
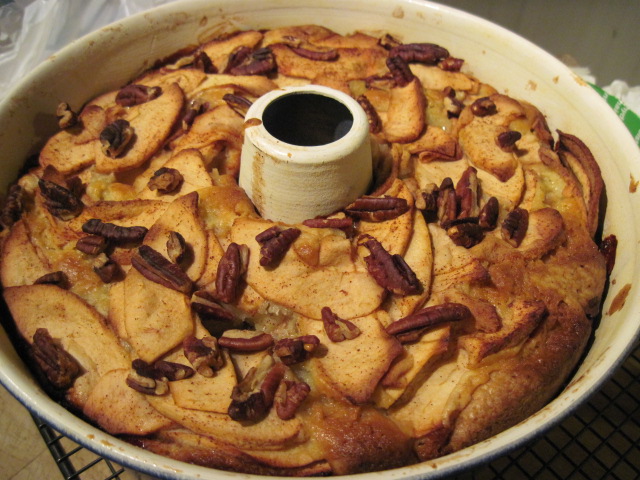
So, the point was that Mandy was making dessert platters of assorted, small desserts.  If you've ever had a cake ball you'll have to agree that they're really rich and although the first small bite is good, you usually don't want any more.  I wanted these to be good and seeing as it was a Fall banquet, I also wanted to use pumpkin.  I remembered this amazing cake from Kraft: Luscious Four-Layer Pumpkin Cake  


Here's the specifics to make this into cake balls: 
Yield: about 60-70 tsp. size cake balls

1 pkg. (2-layer size) yellow cake mix
1 can  (15 oz.) pumpkin, divided
1/2 cup milk
1/3 cup  oil
4 eggs
1-1/2 tsp.  pumpkin pie spice
 
Bake in a large sheet cake pan at 350 for 30 min. 
 
Meanwhile combine:  
1 pkg. (8 oz.) PHILADELPHIA Cream Cheese, softened
1 cup  powdered sugar
 
Once the cake has cooled, mash the cake into the cream cheese and sugar mixture until it is well combined.  Roll into uniform balls and dip in melted white chocolate and sprinkle a pinch of cinnamon on top before the chocolate sets.  

These were so good they were the hit of the evening!  A great dessert for a great cause!


Jewish Apple Cake


My dear friend, Judy, made this cake for us one time and I just had to have the recipe.  It is so good fresh and if you have the joy of having any leftovers it gets better every day!  This is a great Fall cake and works wonderfully as a dessert for a big group of people.  The pieces are large and quite filling.  I served ours with a dallop of fresh whipped cream.


Jewish Apple Cake 
Preheat oven to 350. Grease & flour bundt pan or angel food cake pan.
5-6 thinly sliced, peeled apples
2 tsp. cinnamon
5 tbsp. sugar
Sprinkle cinnamon and sugar over apples and mix to coat.  Set aside.
Combine:
2 cups sugar
1 cup oil
4 unbeaten eggs
1/3 cup orange juice
3 cups flour
3 tsp. baking powder
1/2 tsp. salt
1/3 cup. coarsly chopped nuts
Place half the batter in the pan then layer half the apples on top.  Repeat.  Bake cake for 90 min.  Cool the cake on a rack for 15-20 min. before removing from the pan. 


Campfire Breakfast


One morning this summer we woke up to find Jeremy made us breakfast on the campfire in our backyard.  As we were preparing to eat on the picnic table, it started raining so we had to move our breakfast inside.  As you will see the girls were grumpy about that, but after a bite of the nice, hot meal they got over it!


My New Favorite Hotdog

I found the instructions on how to make a Chicago style hotdog in my Martha Stewart Living magazine this summer.  Once we tried it we were hooked!  These are so good and one is a meal in and of itself.  For our relish we use our picalilli that we canned a couple of years ago when our garden got the blight.  We had so many green tomatoes we didn't know what else to do with them.  Therefore, we have a lifetime supply of it and it is amazing!!! 

Friday, September 23, 2011

A Good Start


As the girls' first day of school with early mornings approached I wracked my brain to come up with a good breakfast that was high in protein. 

It also needed to be able to be made ahead.  That became a slight challenge until I ran across this recipe for mini vegetable frittatas.   As always, I made it my own in that I used a few more veggies and also used what I had on hand.  These were so good and the girls really enjoyed them. 

Their brains had a good start and I felt a great sense of accomplishment!

Leaning Tower of Panini

Jeremy loves this panini sandwich from our local store, but lately they haven't kept to their original recipe.  He hasn't been too impressed, so I went out and bought a bunch of Italian deli meats and cheeses and made my own.  He is seriously impressed with mine now and I don't think they'll ever be able to measure up! 

First I chop up pepperoncini into tiny bits with my food chopper.  You could also use a food processor for this.  I then mix that with mayonnaise and spread it on panini bread. 

Next layer provolone and mozzerella on top of the pepperoncini spread.  Then add your meats.  I used 2 slices each of hard salami, sandwich pepperoni, capicola, and proscuitto. Alternate them so you get a good medley of them in each bite.  Finally top it with your cheeses again.  Spray the outer sides of the bread with Olive Oil and place in a warmed pan over medium heat or use a George Foreman type grill (which I no longer own).  You want to put it over medium heat so that the bread doesn't burn, but so the cheese and meat can warm through.  It takes a little while per side, but make sure not to leave it to burn.

Enjoy!!!

Putting Up Peaches

Our local Farm Market had the BEST peaches this year.  Every time I got one, it was perfect!  I had to keep them for the rest of the year.  I consulted my good friend, Mandy, and she told me how to freeze peaches without using syrups or additives.  It worked wonderfully. 

The first step is to clean out a shelf in the freezer.  Then I placed a large cookie sheet lined with parchment or aluminum foil on the shelf.  I then place my cooling rack on the large sheet and placed a smaller cookie sheet on top of the cooling rack.  This gave me 2 surfaces to work with. 


The next step was blanching, bathing, peeling, slicing, and freezing the peaches.  I brought a pot of water to a boil.  Put the peaches in it for about 30 seconds, removed them from the boiling water and directly put them into an ice water bath. 

 Now you need to start working quickly.  As soon as I peeled off the skin, which comes off really easy, I quickly pitted and sliced them onto a plate an immediately placed the slices onto my prepared cookie sheets in the freezer. 

Try to keep them as separated as possible.  Working quickly at this and doing them one at a time reduced the time for oxidation and discoloration.

I let them freeze for a good hour or so and then placed the frozen slices in zippered freezer bags.  They're beautiful and set to last all year! (We'll see how long they last.  My girls are still begging for them!)